Non-fungible tokens (NFT), as distinctive digital assets, have rapidly become an integral part of our daily lives due to their fast-paced development. Their popularity has soared in recent years, leading to the emergence of various platforms for trading these tokens.
NFTs have gained considerable interest from investors due to their non-fungibility and inherent uniqueness, which enhances their value. If you’d like to explore more about the creation of digital assets and dive deeper into the fascinating world of NFTs, this article will provide you with valuable insights. Let’s embark on this captivating journey together!
You also might like: What Is Binance NFT Marketplace And How To Use It?
NFTs are one-of-a-kind and permanent assets, and creating them is not as easy as some assume. While programming knowledge is not required, making NFTs is not a straightforward process. Nonetheless, users can buy, sell, or easily create their own NFTs using different platforms.

Which Are the Most Popular NFT Platforms?
You might find yourself a bit confused at this point because there is a wide range of options available, making it challenging to decide among the alternatives. Nevertheless, in this article, we will list the most preferred platforms.
Opensea, Rarible, SuperRare, Solanart, Ninty Gateway, Binance NFT, Mintable, and LooksRare are just a few of them. In this article, we will explore how to easily mint NFTs using the Rarible platform.
Minting an NFT refers to the entire process of transforming a drawing, artwork, or piece of music into an NFT.
First, you need to get a software wallet before starting the NFT creation process. This wallet will allow you to easily connect to the platform and proceed with the next steps. For Rarible, one of the most popular wallets is Metamask.
If you don’t have a Metamask wallet yet, you can easily create your personal wallet by watching our tutorial video on “How to Use Metamask” as explained in our educational series.
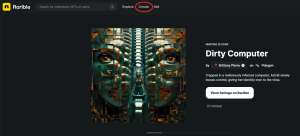
Once you’ve created the Metamask wallet, we can move on to the next step. Rarible acts as both an NFT marketplace and a decentralized network built on Ethereum, allowing direct trading without intermediaries. Furthermore, the platform charges a 1% commission on each sale. The website’s interface appears as follows:
So How Do We Create An NFT?
- After logging into our website, click on the “Connect wallet” located in the top right corner. Through the pop-up window, grant the necessary permissions to connect Metamask to the site.
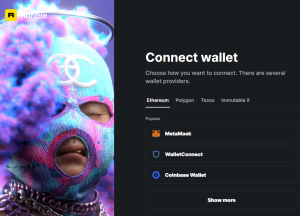
2) After successfully connecting our wallet, click on the “create” option located above. From the options that appear, select the “upload NFT” option.
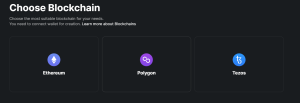
3) In the next step, we decide on which network to mint the NFT. The options include Ethereum, Polygon, and Tezos.
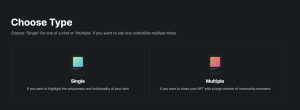
4) In the next step, the site presents us with two options: “single” and “multiple.” Your decision here is actually related to how you want your NFT to be designed. If you want it to be sold at a fixed price, you can choose the “single” option. On the other hand, the “multiple” option allows you to sell it through an auction, letting you sell as many as you desire.
It’s essential to pay attention to the size of the NFT.
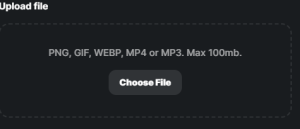
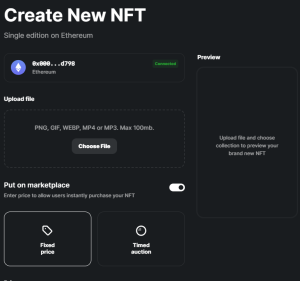
5) At this stage, we upload the NFT to the site by clicking “choose file.” Next, we decide whether to sell it at a fixed price or through a timed auction from the options provided below.
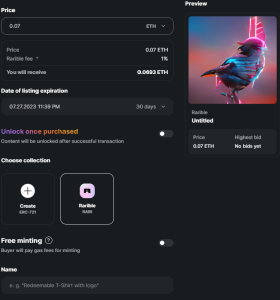
6) As we chose the Ethereum network for our artwork, we set a value of 0.07 ETH. As you can see in the “Rarible fee” section, the platform deducts a 1% fee from us. By using the “Date of listing expiration,” we determine the duration of the listing. The platform enables a low-quality display of the NFT before purchase with the option “Unlock once purchased.” If we choose the “Free minting” option, the buyer agrees to pay the gas fee when acquiring the artwork.
7) In the “Name” section, we give our artwork a desired name. In the “Description” section, we can write about some of the unique features of the NFT. If you are a collector, it’s essential to pay attention to the “description” section of the NFTs you’re buying because certain collections may have exclusive features specific to each NFT.
In the “Royalties” section, you determine the commission fee. This option is quite valuable as it allows you to receive a commission even if the buyer, who is now a collector, resells the NFT to another collector in the future.
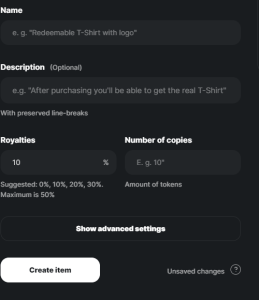
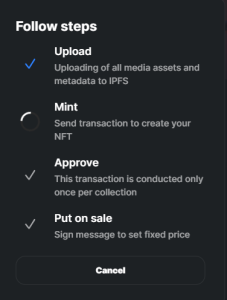
8) After entering all the NFT’s details, we click on the “create item” option. At this point, the website connects to our wallet and requests approval for the NFT creation process. By paying the transaction fee, we successfully showcase our artwork on the desired network. Lastly, it’s worth noting that transaction fees may vary based on the hour, the network used, or day by day.
If you want to learn more about the magical world of NFTs, don’t forget to watch our video titled “What is An NFT?” on the Coin Engineer YouTube channel.
You can write your comments about the topic below. Moreover, if you would like to see more informative content like this, you can follow us on our Telegram, YouTube, and Twitter channels.
