With Bitget Futures, also Bitget exchange also offers this advantage to its users. Generally in the cryptocurrency market, users can do trading, either Spot, Futures, or Options. If you are just starting and you don’t know which side to take, you can try to read our blog post that will help you on this subject. You will see that your decision will be clearer when you think about this choice yet again after this.
If you have chosen the Futures side, let’s start preparing the Bitget Futures user guide for the platform you can use for this trading. The first thing you need to do, of course, will be to register with this exchange or log in. If you want to benefit more from logging in to the Bitget exchange, you can use the registration link where you can get a 10% commission discount exclusively for Coin Engineer followers.
Following logging in to the exchange, you can use the “Trade” button at the top panel on the main page and then the “Futures” button from the new panel opened after it. After clicking, you will be greeted by the Futures screen. If you have used similar fields before, this page will appear easier and more understandable to you.
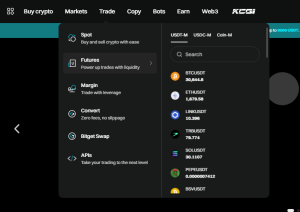
From the screen that opens here, you can enter and manage your transactions and orders. Now, let’s generally discuss what the buttons and functions on the screen are for.
You might like: What is GRVT?
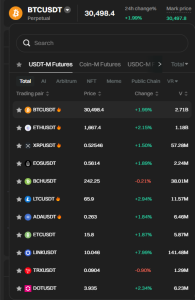
(1) First, you will see the “BTCUSDT” button in the top left corner of your Futures screen. You can use the small black triangle determined next to this button to proceed by determining the assets you want to trade and their pairs from the new tab that opens. You can even add them to your favorites by clicking on the “Star” sign next to them. Trying this on the pairs you frequently trade will be more beneficial in terms of speed.
(2) In the lower part of the previous button, you can see the graph part. Here, based on your predictions that the price will go down or up, you can enter Long/Short orders. On the right side of this graph is the Orderbook. This allows you to track your order flows. Order flows show where the price has strong buyers and sellers. You can also see Market Transactions here. You can understand instantly where the price will go by seeing these transactions.
(3) The Long/Short section that will allow us to take a position is located on the right side of the Orderbook tab. You can use functions such as leveraged amount, Isolate/Margin transaction type, Limit or Market buy/sell order here.
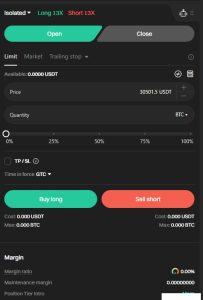
You can also use the Trading Bot instead of doing these operations manually. If you are new to trading, we do not recommend your trading bot to take trades on your own. You can adjust the type of orders you enter using this tab, leverage amount.
(4) After placing your orders and your position is in effect, you can track your position from the tab below. Here you can view your profit and loss situation in the Position (4.1) section.
(4.2) In Followed Orders section, if you have ordered for the price to be realized when it comes to a certain range with a limit order, these orders will accumulate here, not in the Position section, and when the price comes to that point, your orders will start to appear in the Position section by being triggered.
(4.3) In the Strategy section, you can test and order for the strategy you have created.
In past sections, you can check your orders, paid commissions, realized PNLs. In this article, we explored what Bitget Futures is. Stay tuned for more!
In the comment section, you can freely share your comments and opinions about the topic. Additionally, don’ t forget to follow us on Telegram, YouTube, and Twitter for the latest news and updates.
